Can Rust Converters Fix Your Metal Furniture? (UK Verdict)
As an Amazon Associate we earn from qualifying purchases. This page contains affiliate links — if you buy through them, we earn a small commission at no extra cost to you.
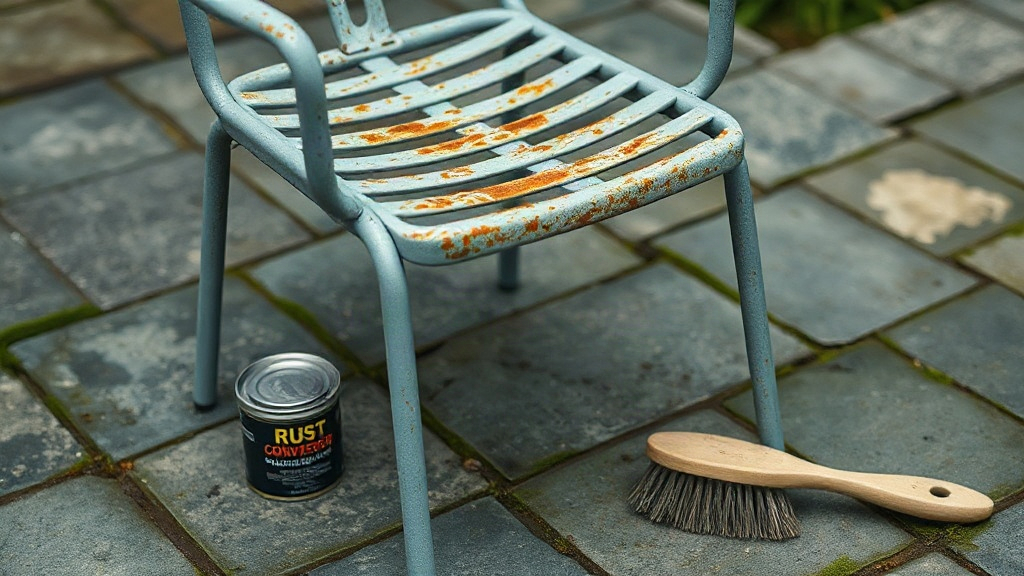
You pull back the cover in March, expecting your metal patio set to have sailed through another wet British winter, and instead you’re looking at orange flakes on the armrest and the start of something uglier creeping across the legs. That’s the moment the internet promises you a miracle: a spray bottle that stops rust in its tracks, no sanding required. You order one, follow the instructions, paint over it, and wait. Two months later the rust is back, pushing the paint up from underneath. What went wrong? Usually one of two things: either the rust was too deep for the converter to reach, or the surface wasn’t prepped properly. Neither is obvious from the marketing. This is the gap worth understanding before you spend good money on a spray bottle that can’t possibly do what you need it to do.
The honest answer on rust converters is nuanced in a way product packaging doesn’t have room for. They genuinely work — but only on a specific type of rust, applied in a specific way, on metal that isn’t too far gone. Everything else needs the wire brush and the primer; that’s not a failure of the product, it’s just the wrong tool for the job. Here’s how to know which one you’re dealing with.
Rust Converter, Remover, or Wire Brush: What Each One Actually Does
Before choosing anything, it helps to know what you’re actually choosing between. There are three fundamentally different approaches to rust on metal furniture, and they’re often lumped together in a way that leads to wrong purchases.
Rust converter is a chemical treatment. It doesn’t remove rust — it converts the iron oxide into a stable compound (typically iron tannate or iron phosphate), leaving a dark surface that paint can adhere to. It stops active corrosion and primes the metal in one step. Crucially, it is not paint.
Rust remover is a liquid that dissolves rust, returning the metal to bare steel underneath. Think of it as a stripper rather than a treatment — useful when you want to get back to clean metal, though less commonly needed for garden furniture repair than the other two options.
Mechanical preparation — wire brushing, sanding, grinding — physically removes rust by abrasion. It is labour-intensive but it’s the only method that gets rid of the rust entirely rather than transforming or dissolving it. This is what you need when the rust has gone deep.
The three states of rust on garden furniture break down cleanly once you know what to look for. Flash rust is a light surface layer, still firmly bonded to the metal — a dull brown-orange film with no texture. Pitted rust is where the corrosion has eaten into the metal itself, leaving visible holes or deep grooves; the surface feels rough and crumbly. Flaking paint with rust underneath is the most common UK garden furniture failure mode: the powder-coated or painted finish has cracked, moisture got in, and rust has spread beneath the coating while the surface still looks partially intact.
The critical mistake owners make is reaching for a converter on pitted metal — and that’s where the product gets blamed for a misapplication.
The Verdict: When a Converter Works, and When It Can’t
The verdict is straightforward once you understand what each product can physically do.
Rust converters win clearly on light surface rust — flash rust on a recently exposed spot, a small scratch that’s started to orange, the kind of early-stage corrosion that’s still thin enough for the chemical to penetrate right through to the base of the oxidation. In those cases, a converter like Hammerite Kurust (paid link) stops the rust, creates a paintable surface, and does it with minimal elbow work. That’s exactly what the product is designed for, and it delivers.
Buy on Amazon → (paid link)
The flip is that converters cannot fix deep pitted rust. The chemical reaction that turns iron oxide into iron tannate can only happen where the converter makes contact. In a pit, the converter sits on the surface rust at the top of the hole. It cannot reach the base of the pit, where the metal is still corroding. Six months later, the rust bleeds back through the converted layer from the bottom of the pit. Owners who report that “the rust came back” after using a converter almost always had pitted rust they didn’t realise was pitted.
The mechanism is the key: rust converter works by chemically transforming iron oxide, but it needs a thin, continuous layer to penetrate. Where rust has created voids — holes, deep grooves, crumbly texture — there’s no continuous layer, just loose oxidation sitting in a depression. The converter sits on top and does nothing to the metal below.
For pitted rust and for flaking paint with rust underneath, the only long-term fix is mechanical removal down to sound metal, followed by a proper primer and paint. Wire brush until you see shiny bare steel, wipe clean, apply a red oxide primer, then a topcoat. It is more work than a spray bottle, but it is the only approach that actually solves the problem.
Here’s a quick way to check your furniture before you buy anything: run a fingernail across the rust. If it comes away cleanly and leaves a groove or a hole, that’s pitted rust — converter won’t reach the bottom of that groove. If it feels like a firmly bonded film, a converter is potentially viable.
| Rust type | Best approach |
|---|---|
| Light surface / flash rust | Rust converter |
| Deep pitting / visible holes | Wire brush to bare metal + primer + paint |
| Flaking paint with rust underneath | Wire brush to bare metal + primer + paint |
That decision matrix is really the article in miniature. Everything else is execution.
Applying a Converter: Prep, Timing, and the UK Weather Problem
If your rust passes the fingernail test and is still at the surface stage, here’s how to do it properly — and the UK climate adds a few specific complications that the product instructions often skip.
📺 Watch: Best Rust Converter? POR-15, Eastwood, Rust-oleum Rust Reformer, Gempler's — Project Farm
Step 1 — Prep, which is the step most failures skip. Clean the area with warm water and a mild detergent to remove dirt and any greasy residue. Then go over it with a wire brush or coarse sandpaper to remove any loose rust — you’re not trying to remove all the rust at this point, just the flaky, crumbly bits that aren’t bonded to the metal. If the rust is firmly bonded, leave it; the converter needs it there. Skipping this step is the single most common reason converters fail in practice: the product sits on top of the loose rust rather than bonding to sound metal, and flakes straight off the first time you paint over it — an avoidable outcome the packaging rarely flags clearly enough.
Step 2 — Apply the converter. Brush or spray on evenly, following the product’s coverage instructions — most sit somewhere in the region of 80-100ml per square metre rather than a thin lick, though this varies by brand and by how textured the rust is, so check the tin rather than guessing. Leave it to react. Most converters turn from clear or milky to dark brown or black as they cure — that colour change tells you it’s working.
Step 3 — Dry and paint within the window. The converted surface needs to be fully dry before you paint over it. Most converters recommend painting within 24-48 hours, though some formulations extend this window. Check the can — painting too late means the converted layer starts to degrade.
UK weather warning: this is where UK owners most commonly come unstuck. Rust converters need dry conditions to cure properly — manufacturer cut-offs vary, but once humidity pushes past the mid-60s to mid-80s percent range that most formulations quote, the chemical reaction doesn’t complete fully and the converted layer won’t bond well to paint. Don’t apply if rain is forecast within 24 hours. Don’t apply when the metal is cold and damp from an overnight temperature swing (which is most summer mornings in the UK). A dry afternoon after a genuinely clear day is the right window.
If you’re treating a spot that sits in a sheltered corner of your patio that never quite dries out, that damp microclimate will undermine the converter even when the rest of the garden seems fine. Check that specific spot before you commit to the product.
Now you know what to look for before you start — Get the Free Garden Furniture Care Checklist to help you assess your furniture’s rust type and plan the right treatment.
When to Choose Mechanical Removal (Wire Brush and Paint)
For deep pitting, there’s no product that can replace what you’re about to do with a wire brush. The reason is mechanical, not chemical: if the metal has holes in it, no liquid can travel down into those holes and convert rust that’s happening beneath the surface. You have to expose that metal.
📺 Watch: Quick Tip #12 - How to repaint rusty metal objects — Alley Picked
The process is labour-intensive but not technically demanding. Work a wire brush (hand-held or attached to a drill) across the rusted area until you see clean, shiny metal. If the rust has spread under the paint around it, brush back until you reach sound coating on all sides of the affected area. Wipe the dust away with a clean cloth. Apply a red oxide or etch primer specifically formulated for iron and steel — this creates a bond to the bare metal that the converter route simply can’t achieve. Once the primer is cured, overcoat with a proper outdoor metal paint.
The trade-off between the two routes deserves a straight answer. A rust converter treatment for light rust is the cheaper route for the product itself, takes an hour including prep, and might need redoing in a few years if moisture gets back underneath the paint. Wire brushing and repainting costs more in time and effort (the brush itself is cheap — under a tenner for a decent hand-held one), but it addresses the root of the problem. If the furniture is structurally sound and worth saving, mechanical preparation is the one that lasts. If it’s a cheap set you’re treating cosmetically for another season or two, a converter is a legitimate shortcut — just be honest with yourself about which situation you’re in.
It’s also worth separating this out by material. Cast iron furniture (common in traditional bistro sets) pits more often than not, because its rough, porous surface structure traps moisture against the metal — those sets usually need the mechanical route. Wrought iron and powder-coated tubular steel, the material behind most modern metal-frame sets, tend to surface-rust rather than pit, which means converters are more often viable on those. (Genuine aluminium furniture doesn’t rust at all — the orange staining you sometimes see on it is usually corrosion transferred from a rusting steel fitting or bracket nearby, not the aluminium itself.)
Product Recommendations (UK Market)
This is where the brief gives you enough to be properly useful, so here are the actual options for UK garden furniture, with their honest trade-offs.
For rust converters:
Hammerite Kurust (paid link) is the one most UK owners reach for, and it’s worth its salt for small surface-rust spots — stone chips on a metal chair leg, a scratch on a table frame, that sort of area. It goes on brush or spray, reacts quickly, and leaves a dark paintable surface. The gripes that come up in owner reviews are that it can be thin and run if over-applied, and that results are mixed if the metal beneath is badly pitted — which is the converter’s fundamental limitation, not Kurust’s fault. For small spots on sound metal, it’s the straightforward choice, and a small tin is inexpensive — usually well under a tenner from mainstream DIY retailers, a little more from specialist trade suppliers.
Jenolite is the other name that comes up repeatedly. It covers a broader range — sprays, brush-on liquids, gels for vertical surfaces — and tends to be praised for convenience on awkward rust spots. Coverage is good and a little goes a long way. Owner reviews note that it works well on light-to-moderate surface rust but the results still depend on prep; applying it over loose rust without wire-brushing first is the most common reason it underperforms. Prices for the spray format are competitive with Hammerite Kurust.
For the primer-and-paint route:
Hammerite Direct to Rust is essentially the same brand doing the full job — it combines a rust-stabilising primer with the topcoat in one product, which sounds convenient but has a real trade-off attached. For deep pitted rust, it still needs the mechanical prep first; for surface rust, it’s a legitimate 3-in-1 option. The catch is that a single product doing three jobs is a compromise at each of those jobs. For a furniture set where the rust was truly light, it’s effective.
Rust-Oleum Stops Rust is the alternative, and it earns its place on the shortlist for its colour range and UV resistance — important for furniture that sits in full sun. It’s a proper primer-then-topcoat system applied separately, and owners consistently report good durability when the prep work is done right. If you’re going to the trouble of wire-brushing, it makes sense to use a dedicated paint system on top rather than a combo product.
Between the two paint routes, Hammerite Direct to Rust and Rust-Oleum Stops Rust are the two names that come up most often in UK reviews and owner forums, and both outlast budget alternatives that tend to chalk and peel within a season or two. For furniture that sits in full sun specifically, treat UV resistance as the spec to check first — standard metal paints without it can fade and degrade noticeably faster.
The honest summary: for light surface rust on a set worth maintaining, Hammerite Kurust followed by Rust-Oleum (or Hammerite Direct to Rust if you want simplicity) is a solid, tested route. For deep rust, spend the extra effort on mechanical prep and treat the paint system as a long-term investment rather than a quick fix.
Frequently Asked Questions
Can I use vinegar to remove rust from metal furniture?
White vinegar can dissolve light surface rust — the acetic acid reacts with iron oxide — and some owners use it as a budget alternative. The honest answer is that it’s less effective than a dedicated rust remover for anything beyond the smallest spots, and it doesn’t leave the surface in as good a condition for painting as a proper converter does. It’s a reasonable option for a very small isolated scratch, but it’s not a substitute for the real products on a patio set.
Will a rust converter stop rust forever?
No. A converter stops active rust by converting the existing iron oxide layer, but it doesn’t make the metal invulnerable to moisture. If water gets through the paint you apply over the converted layer — and it will eventually, as paint ages in a British winter — new rust can form. The converter buys time and a paintable surface; the paint protects the surface long-term. Think of it as a partnership, not a permanent cure.
As an Amazon Associate we earn from qualifying purchases. The products linked above are ones we recommend based on independent research and owner feedback.
The Ten-Second Test, and What to Do Next
The decision comes down to one honest question: how deep is your rust?
If the rust is a surface film — still firmly bonded, no holes or grooves when you run a fingernail across it — a rust converter like Hammerite Kurust or Jenolite is a legitimate, cost-effective treatment. Prep it properly, apply it in dry conditions, and paint over it within the window. It’ll hold for a few seasons if the paint stays intact.
If there’s pitting, deep grooves, or rust bleeding through from underneath flaking paint, skip the converter. Wire brush it back to clean metal, use a proper primer and paint, and you’ve solved the problem rather than deferred it.
The difference between those two outcomes comes down to the same fingernail test from earlier in this piece — run it before you buy anything, not after. That’s the honest call, and it’s why most of the negative reviews for rust converters are really reviews for the wrong application on the wrong rust.
Related Guides
For a complete overview, see our Which Oil for Outdoor Wooden Furniture: Teak vs Softwood vs Hardwood UK.
If you’re working out what your specific set needs and how to prioritise the repairs before winter, grab the Free Garden Furniture Care Checklist — it’s the practical next step once you know which route you’re on. For product-specific application guidance beyond what’s covered here, Hammerite, Rust-Oleum and Jenolite publish their own instructions, and it’s worth checking those against the tin in front of you, since formulations do change between batches. Treat everything above as a general steer rather than a replacement for your specific product’s label.